

Has a background in writing for an interior design publication. Also, a DIYer and lifelong dog lover, she enjoys creative projects around the home specifically designed to comfort her 2 dogs.*
Has a background in writing for an interior design publication. Also, a DIYer and lifelong dog lover, she enjoys creative projects around the home specifically designed to comfort her 2 dogs.*
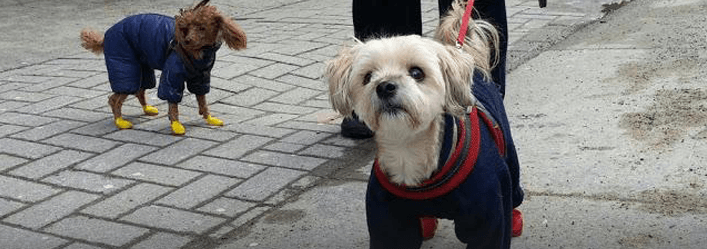
One of the main reasons why we love dogs is for their never-ending energy. They love to run all.over the place with a special preference for the outdoors. However, winter comes with drastic drops in temperatures and the energy to have fun disappears. Now we have to painfully watch our babies lay down and wait for their chance to come again, or not.
Protect your babies’ paws in style with a simple homemade dog mitt. Depending on what color you choose, it also serves as an extra protective measure during our nightly walks to stay visible. It's also a good way to keep paws a little cleaner after coming back from a long walk.
Black fleece
2 - 4 inches suede (can be canvas or denim)
4-6 inches strips of double-sided Velcro
Light sewing machine
Heavy duty thread
Pair of scissors
Sheet of paper
Pencil
Black fleece
2 - 4 inches suede (can be canvas or denim)
4-6 inches strips of double-sided Velcro
Light sewing machine
Heavy duty thread
Pair of scissors
Sheet of paper
Pencil
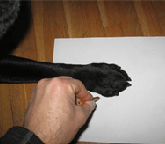
Step 1: Pattern
We need to create a pattern. Trace one of your dog's foot. Since the mitts should fit snugly but not tightly, draw a rough outline 1/2 - 1 inch larger than the actual size of the foot. Put more allowance near the ankle creating a flare to put their foot in easily. The total length of the shoe could be just short of your dog's rear leg joint, about 6 inches.
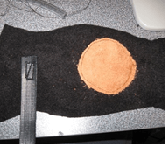
Step 2: Mitts
Get your material (fleece) and fold it into two. Place the cut outline pattern on the material. The toe-end part is along and parallel to the fold. Cut the outline out of the material resembling a "bowtie" like shape. Repeat the process for the other 3 mitts. For the wear pad, cut out circles from the suede material. The circles should be the same size as the dog paw/foot. Cut 4 pieces of Velcro 2 times the width of the mitts (or the cut-out fleece), about 6 inches. This is for the mitt strap.
Step 3: Sewing
Sew the wear pad in the foot area - it will be placed outside of the mitt to prevent slipping. Attach the mitt strap (Velcro) on the ankle part of the mitt, just 3 inches above the wear pad. Fold the fleece over so the pad and strap are inside. Sew along the edge from the fold up to the flare. Then sew lock the edge. Flip the mitt inside out to sew the other seam in the same manner. And you're done!
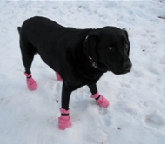
Any mitt can fit right to any foot. The Velcro strap should be wrapped around their ankle snugly but not too tight. Some dogs do not take to the mitts right away, but their feet will be protected from the cold and they can now freely enjoy running in the snow in comfort.


We are here to provide you inspiration with our growing collection of reviews, food recipes, and DIYs.
All write-ups are created by expert authors to deliver you easy-to-follow articles with your dog's welfare in mind.


We offer you practical tips and crafts to help you make the best out of the stuff in your home.


